So, you're thinking about diving into the wonderful world of sourdough? That's fantastic! Sourdough baking can seem intimidating at first, with its bubbling starters, long fermentation times, and talk of autolysing flour. But trust me, with a little patience and this guide, you'll be baking crusty, tangy loaves in no time. This complete beginner's guide will walk you through everything you need to know to bake your first loaf of sourdough bread, from cultivating your own starter to that satisfying moment when you pull a beautiful, golden-brown loaf from the oven. Let's get started!
Building Your Sourdough Starter
The heart and soul of sourdough bread is, of course, the starter. It's a living culture of wild yeast and bacteria that will leaven your bread and give it that characteristic tangy flavor. Don't be discouraged if it takes a little while to get going – this is a process, not a race!
- Combine Flour and Water: In a clean jar, mix equal parts (typically 50g each) of whole wheat or rye flour and unchlorinated water (filtered or bottled is best). Stir until there are no dry clumps.
- Cover and Wait: Loosely cover the jar with a lid or cloth and let it sit at room temperature (ideally 70-75°F / 21-24°C).
- Daily Feedings: For the next 7-10 days, discard about half of the starter and feed it with equal parts (again, 50g each is a good starting point) of fresh flour and water. Mix well.
- Observe and Wait (Again!): You'll notice bubbles forming as the yeast wakes up. The starter will likely double (or more!) in size after each feeding. This is a sign it's ready to bake with.
- Signs of Readiness: A mature, active starter will double in size within 4-8 hours after feeding, have a slightly sour aroma (think yogurt or beer), and be full of bubbles. If your starter consistently rises and falls and shows signs of activity, you are ready to bake!
Sourdough Tip: Don't throw away your discard! Use it to make pancakes, waffles, crackers, or even add it to other baked goods for a subtle sourdough flavor.
Baking Your First Sourdough Loaf
Now that your starter is active and bubbly, it's time to bake! This recipe is a simplified version for beginners, focusing on understanding the basics.
Ingredients:
- 100g active sourdough starter
- 350g unbleached bread flour
- 250g unchlorinated water
- 8g salt
Instructions:
- Autolyse: In a large bowl, combine the flour and water. Mix until just combined and let it rest for 30-60 minutes. This allows the flour to fully hydrate, resulting in a more extensible dough.
- Incorporate Starter and Salt: Add the active starter and salt to the autolysed dough. Mix thoroughly, either by hand or with a stand mixer, until the dough is smooth and elastic (about 5-10 minutes).
- Bulk Fermentation: Place the dough in a lightly oiled bowl, cover, and let it ferment at room temperature for 4-6 hours. Perform "stretch and folds" every 30-60 minutes during the first 2-3 hours. To do this, gently stretch a portion of the dough upwards and fold it over the center. Rotate the bowl and repeat until you've stretched and folded all four sides. This strengthens the dough and develops gluten.
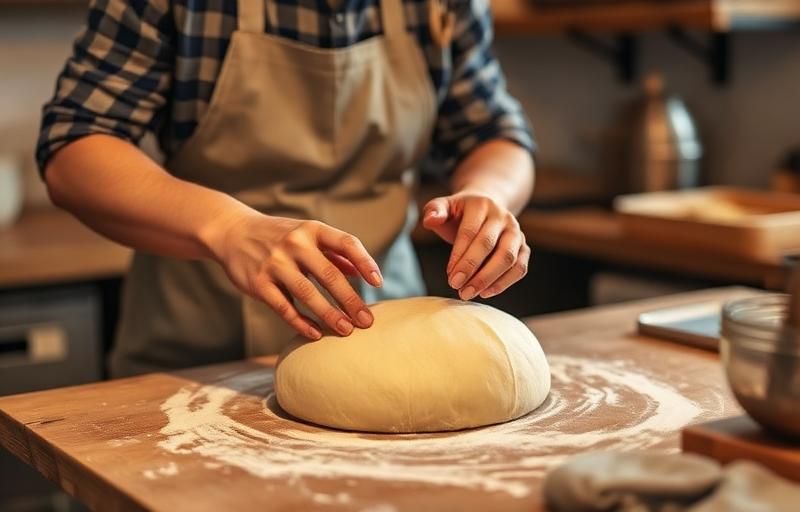
- Shape and Proof: Gently shape the dough into a round or oblong loaf. Place it in a well-floured banneton basket or a bowl lined with a floured cloth. Cover and refrigerate overnight (8-12 hours). This slow, cold proof develops flavor.
- Bake: Preheat your oven to 450°F (232°C) with a Dutch oven inside. Carefully remove the hot Dutch oven from the oven. Gently invert the dough into the Dutch oven. Score the top of the dough with a sharp knife or lame. This controls how the bread expands during baking.
- Bake Covered: Cover the Dutch oven and bake for 20 minutes.
- Bake Uncovered: Remove the lid and bake for another 25-30 minutes, or until the loaf is deeply golden brown and the internal temperature reaches 205-210°F (96-99°C).
- Cool Completely: Transfer the loaf to a wire rack and let it cool completely before slicing and enjoying. This is crucial for the crumb to set properly!
Sourdough Tip: Scoring your loaf is not just for aesthetics! It allows the steam to escape in a controlled manner, preventing the bread from bursting unpredictably. Experiment with different scoring patterns!
Troubleshooting and Tips
Sourdough baking is a learning process, and you're bound to encounter some challenges along the way. Here are a few common issues and how to address them:
- Flat Loaf: This can be caused by an underactive starter, over-proofing, or weak gluten development. Make sure your starter is doubling reliably before baking. Try reducing the proofing time, and ensure you're performing stretch and folds effectively.
- Dense Crumb: A dense crumb can also be due to under-proofing or not enough gluten development. Experiment with longer bulk fermentation times and more aggressive stretch and folds.
- Gummy Crumb: This usually happens when the bread is sliced before it's cooled completely. Be patient! Letting the bread cool fully allows the starches to set properly.
- Too Sour: This could be due to a very mature starter or a long fermentation. Try feeding your starter more frequently, using a lower percentage of starter in your dough, or shortening the fermentation time.
Sourdough Tip: The temperature of your kitchen plays a big role in fermentation. Warmer temperatures will accelerate fermentation, while cooler temperatures will slow it down. Adjust your proofing times accordingly.
Remember, sourdough baking is a journey, not a destination. Don't be afraid to experiment, learn from your mistakes, and enjoy the process. With a little patience and practice, you'll be rewarded with delicious, homemade sourdough bread that you can be proud of. So, go forth and bake! And more importantly, enjoy eating your creations!